Part 1. CrossChex Connection Guide
1) Connection Via the TCP/ IP model
2) Two ways to remove the admin permission
Part 2. Reset Anviz Devices Admin Password
1) Connected to the CrossChex but the admin password is lost
2) The device communication & admin password are lost
3) The keypad is locked, and communication and admin password are lost
Part 1: CrossChex Connection Guide
Step 1: Connection via the TCP/IP model. Run the CrossChex, and click the 'Add' button, then the 'Search' button. All available devices will be listed below. Choose the device that you want to connect to the CrossChex and press the 'Add' button.
Step 2: Test if the device is connected to the CrossChex.
Click the 'Synchronize time' to test and make sure the device and CrossChex are connected successfully.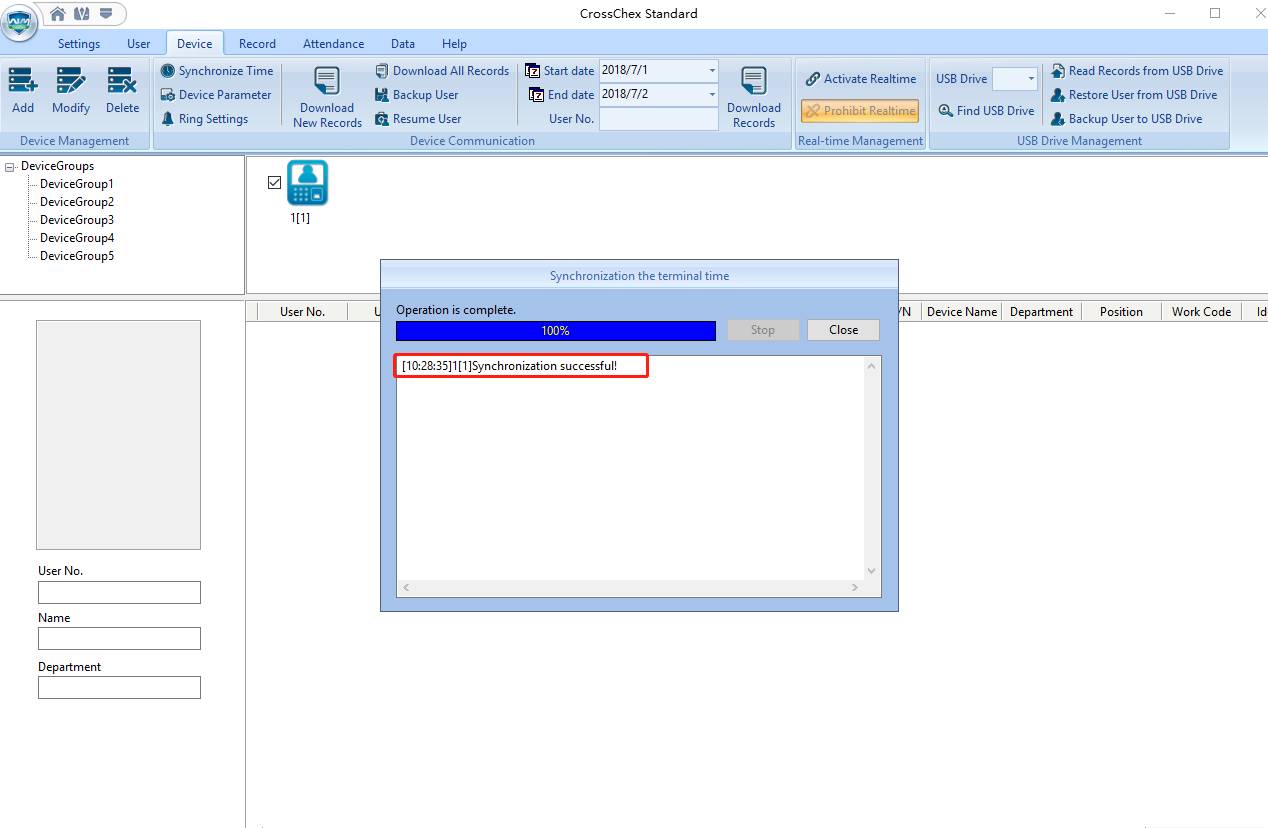
Step 3.1.1
Select user/s that you want to cancel administrator permission, and double click the user, then change 'administrator' (the administrator will display in red font) to 'Normal user'.
CrossChex -> User -> Select one user -> change Administrator -> Normal user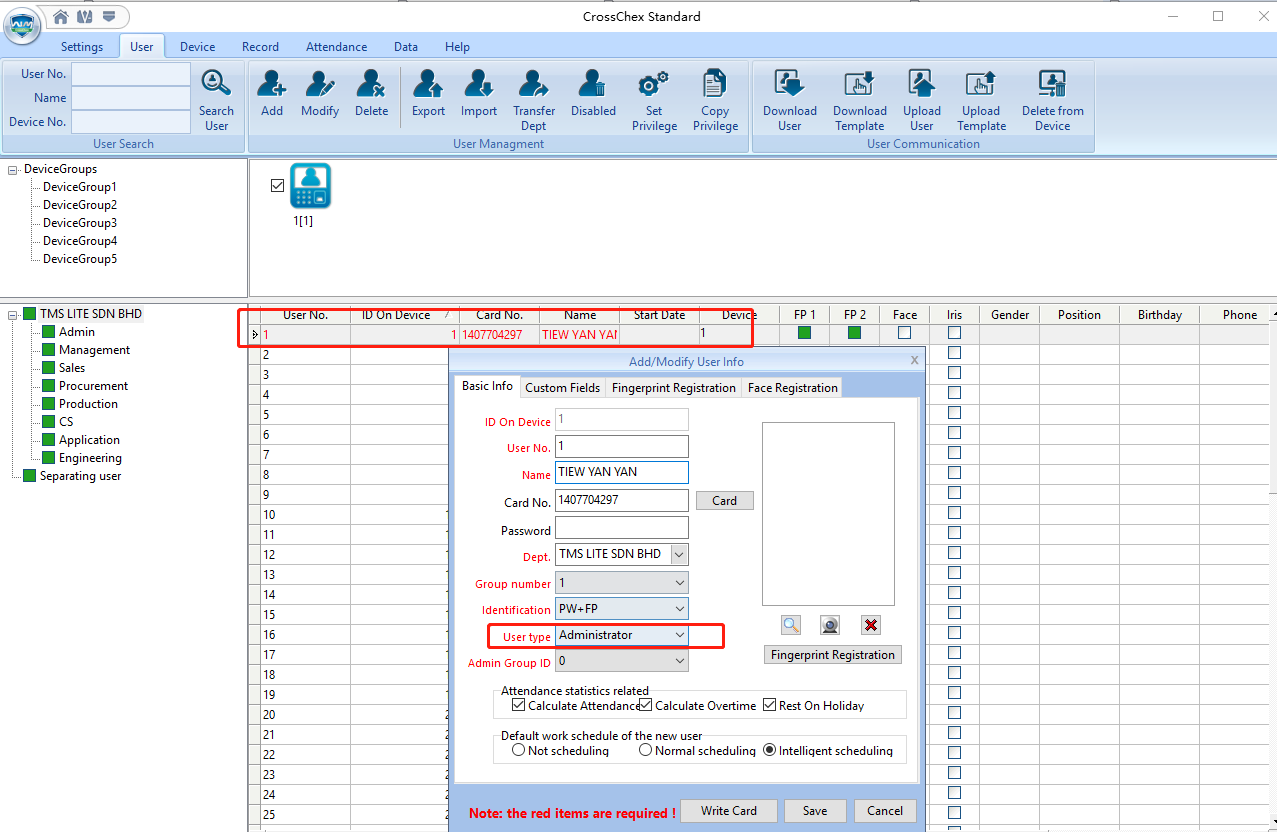
Choose 'Normal user', then click the 'Save' button. It will remove the user's admin permission and set it as a normal user. 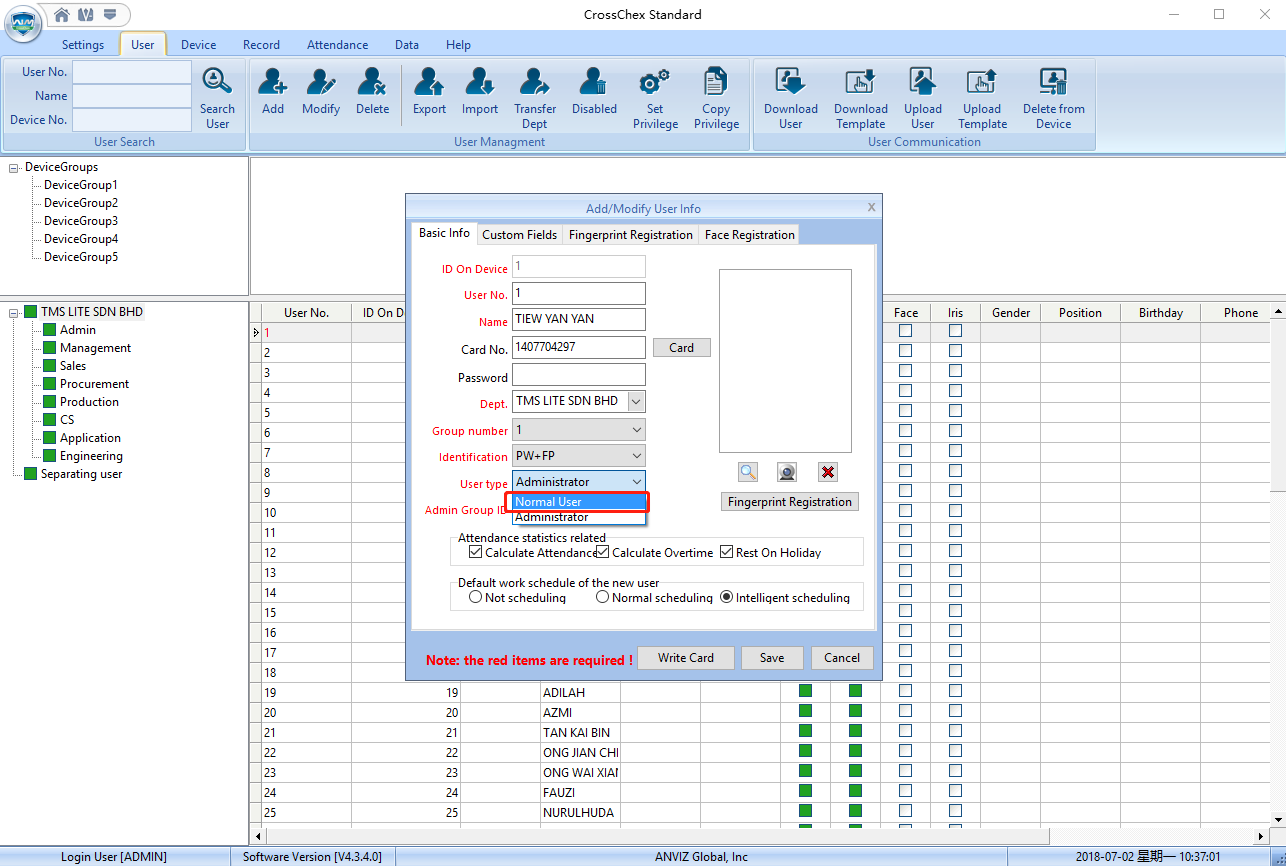
Step 3.1.2
Click 'Set Privilege', and choose the group, then click the 'OK' button.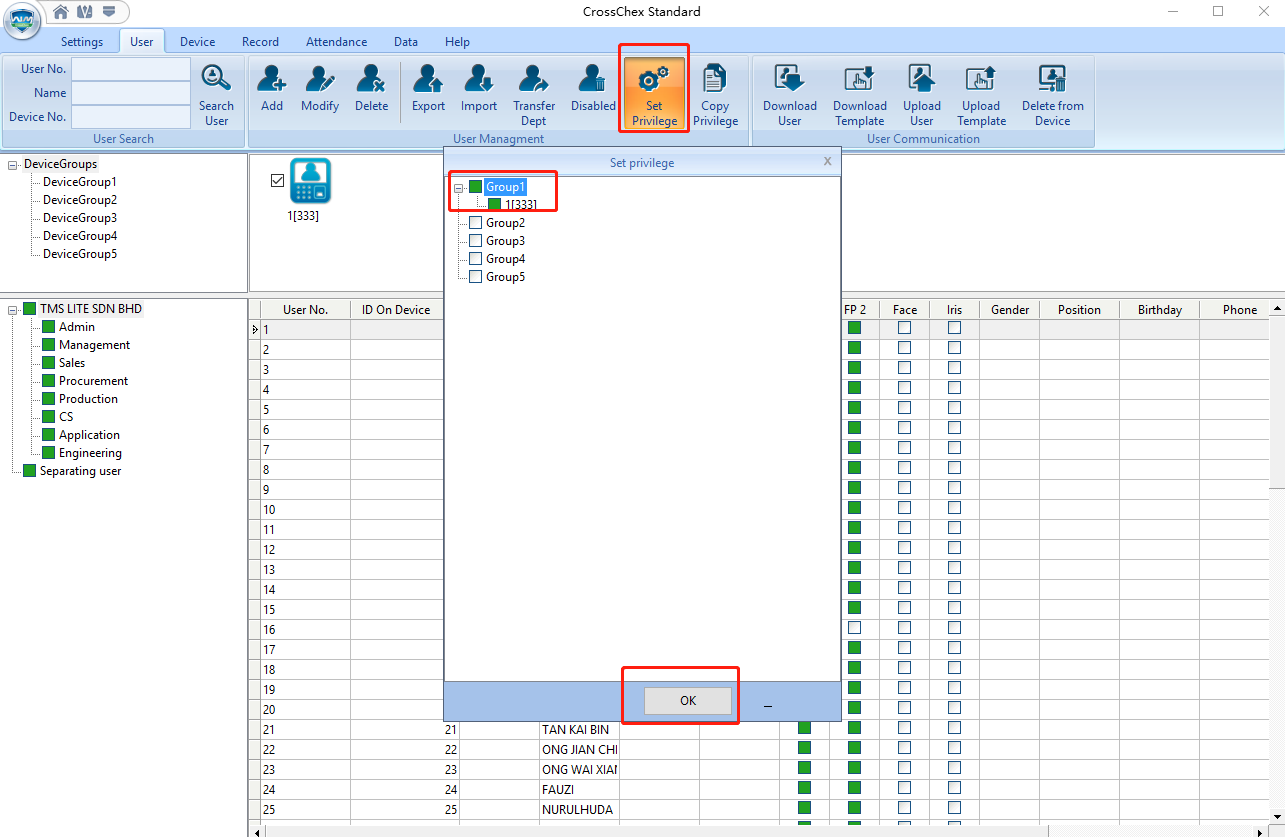
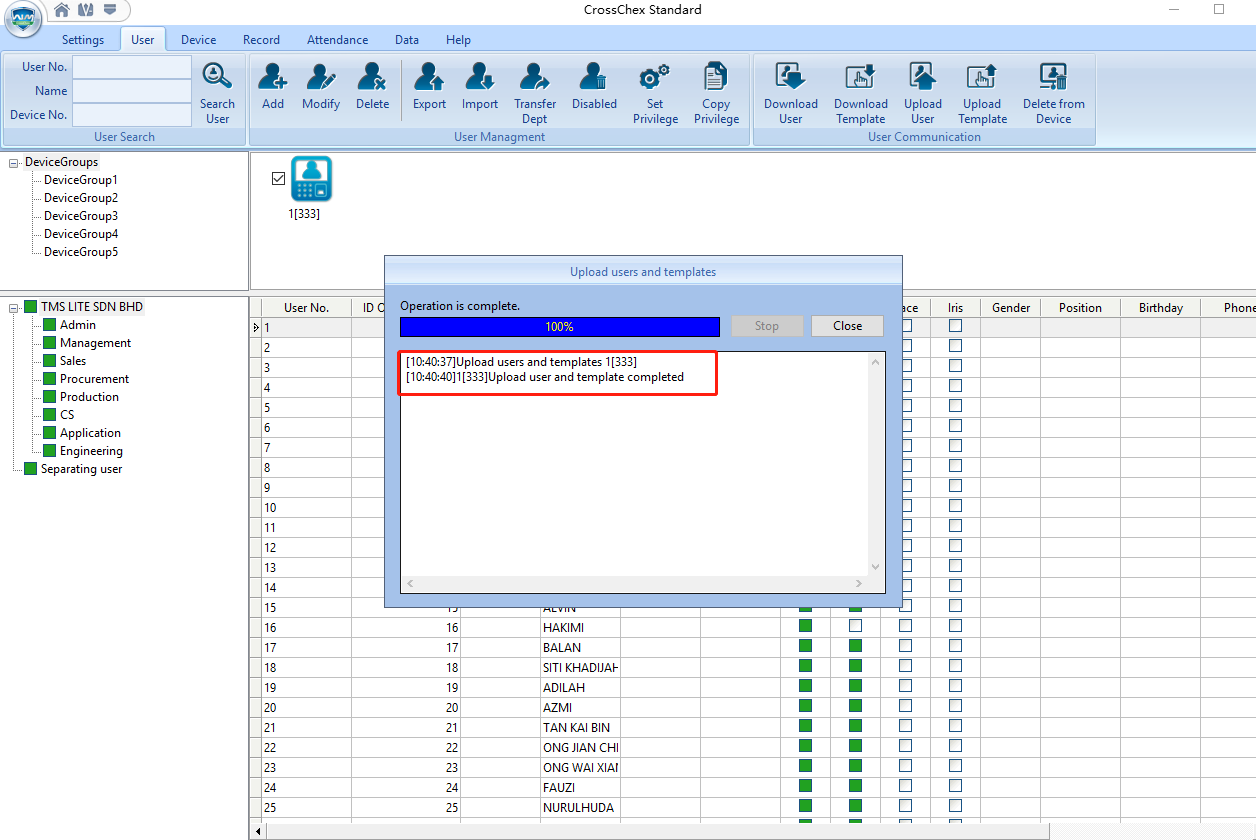
Step 3.2.1: Back up the users and records. 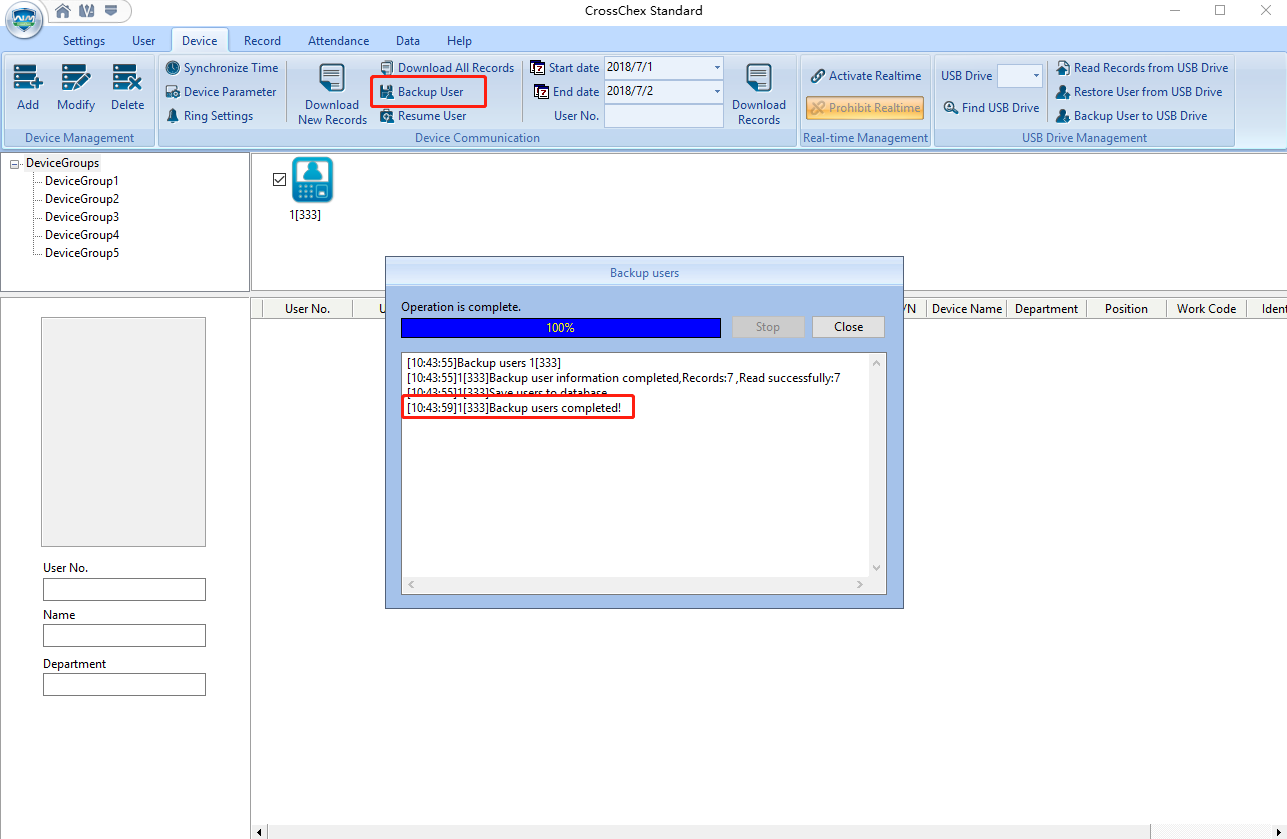
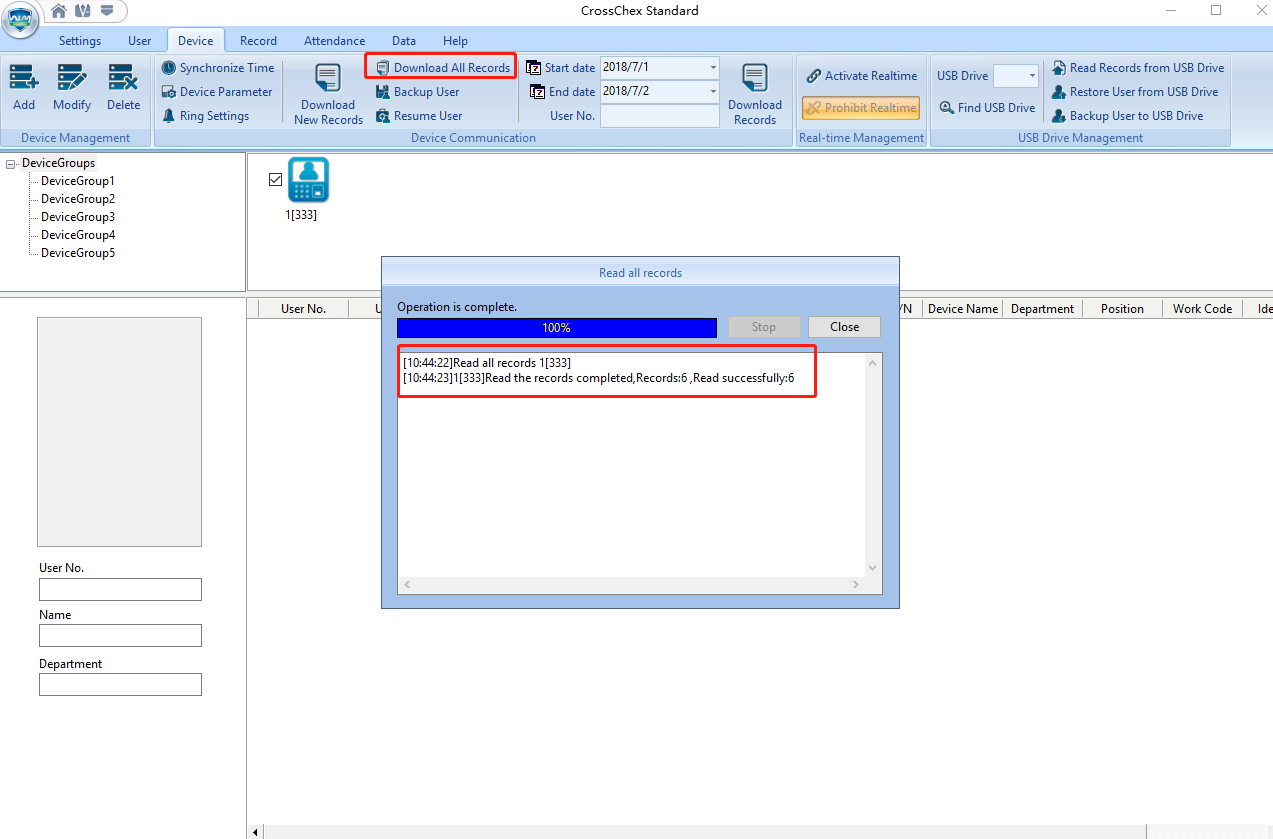
Step 3.2.2: Initialize the Anviz Device (********Warning! All Data Will Be Removed! **********)
Click 'Device Parameter' then 'Initialize the device, and click 'OK'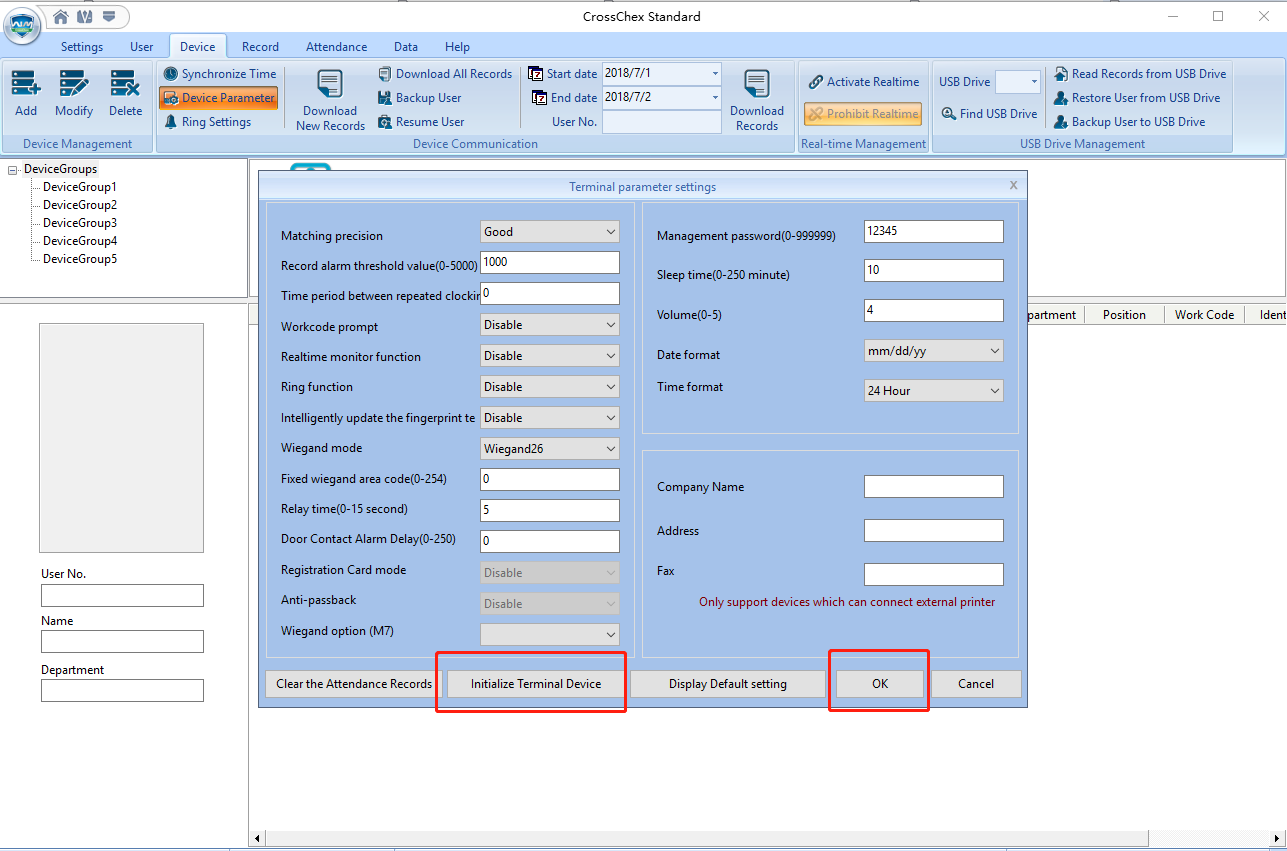
Situation 1: Anviz device is connected to the CrossChex but the admin password is forgotten.
CrossChex -> Device -> Device Parameter -> Management password -> OK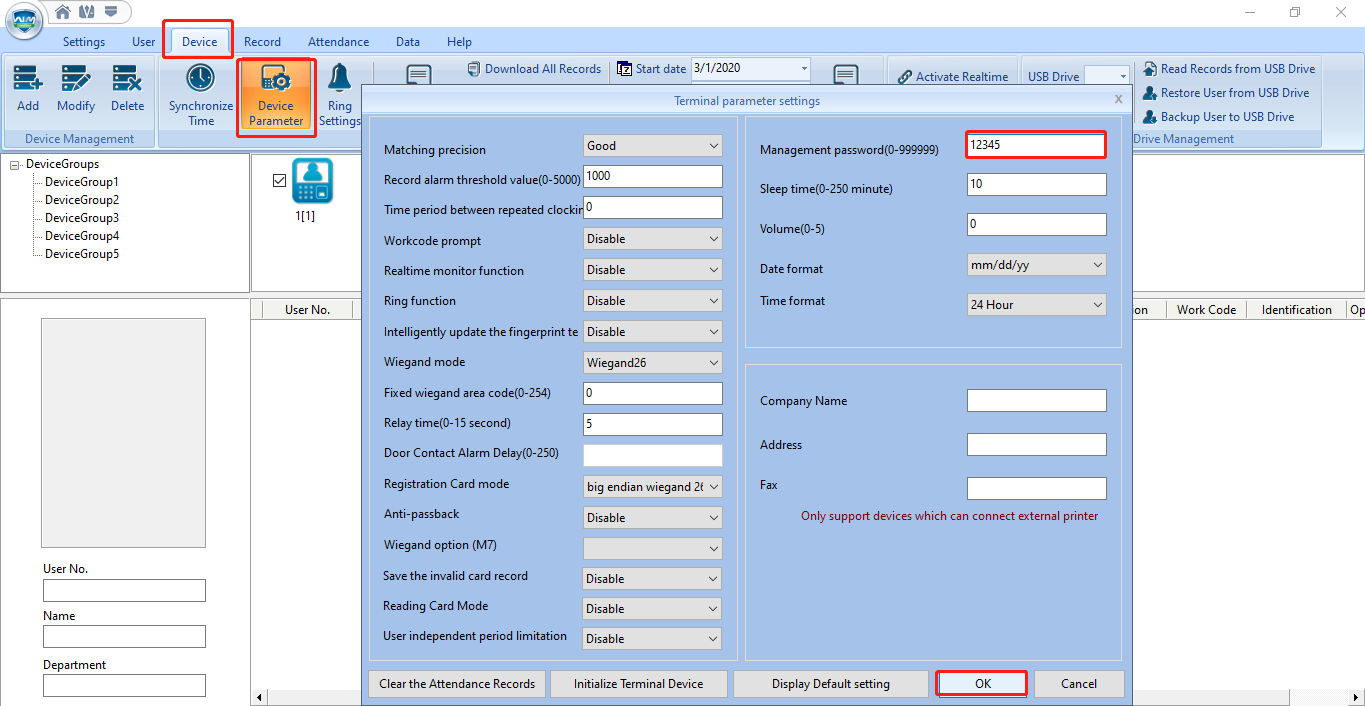
Input '000015' and press 'OK'. A few random numbers will pop up on the screen. For security reasons, please send those numbers and the device serial number to the Anviz support team (support@anviz.com). We will provide technical support after receiving the numbers. (Please DO NOT turn off or restart the device before we provide technical support.)
Input 'In' 12345 'Out' and press 'OK'. It will unlock the keypad. Then follow the steps as Situation 2.

Comments
0 comments
Please sign in to leave a comment.